Skip to content Skip to footer
Skip to main content
< All Topics
Print

Dok 32 Guide

Topic Objectives:

Login:

Once you are part of a customer service team you are granted an access with your user’s name and  password.

Once login is completed, we have 2 options
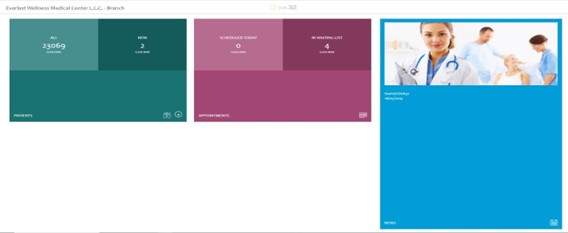
  • Patients, where we can see all registered patients with our facility. “Dark Green Color”
  • Appointments, where we can see all booked appointments details. “Purple Color”

For the patient’s department we can search any patient using various keys using the following sequence:
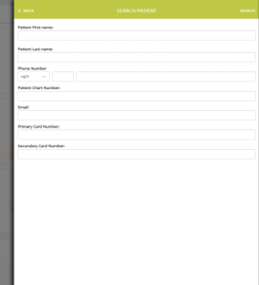
  • Name of the patient (first or last).
  • Chart number of the
  • Phone number of the patient.
  • Email of the
  • National Id number.

For the appointment’s department we can see all booked appointments including history and future appointments; also, we have multiple tool par
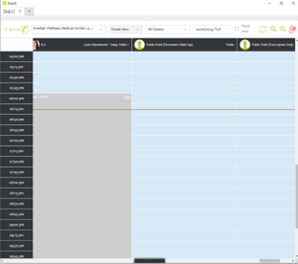
1- How to search for booked appointment:

Tap the magnifying glass button located on the upper right hand side
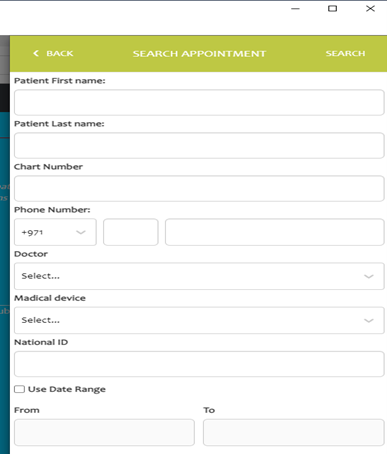
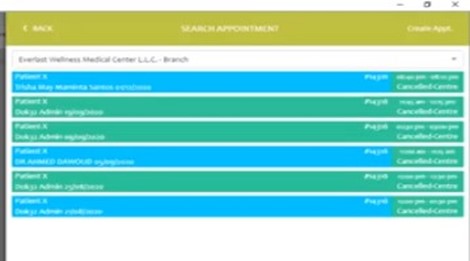
We use one of the search keys above then hit search or enter, then all booked appointments are shown
2- Appointment interface:

We have different slots on our dashboard:
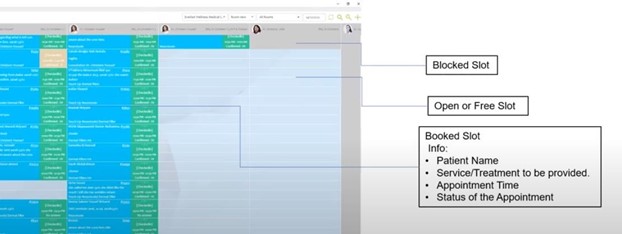
  • Gray color: Blocked slots mean service provider is not available for that time, and we can’t book any appointments in that
  • Baby Blue color: Free slots mean service provider is available and we can book an appointment in that timing.
  • Blue color: Booked slots mean service provider is available but that time is booked for another patient and we can see booking details in that

3- How to create new appointment:

To book an appointment Click on the free slot “Baby blue color” and then this screen would appear
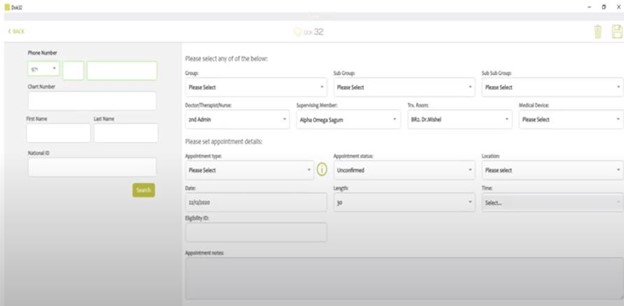
We start filling the needed patient’s data, first step would be to insert one of the key identifiers:
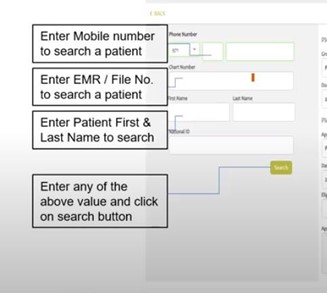
  • Phone Number
  • Chart number
  • First or last name

  • National ID

Most of the time we have the patient’s phone number so after we enter the search key, we

press search button below, when using the phone number, we have 3 scenarios:

1- More than one patient is registered on the same number
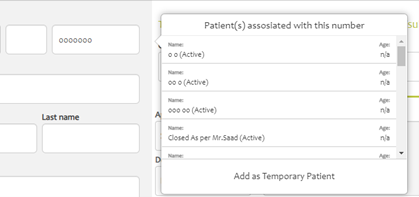
In this case we ask the patient under which name they would like to make the booking and then click on the name.

2- Only one patient is registered on the number
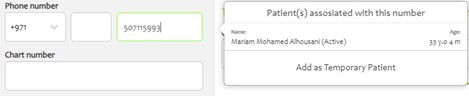
In this case we just click on the name.

3- No patient is registered on this number

That means the patient is temp or it’s the first time to visit our center. In this case we click on “add as Temporary patient”

This screen will appear then we need to fill first and last name.
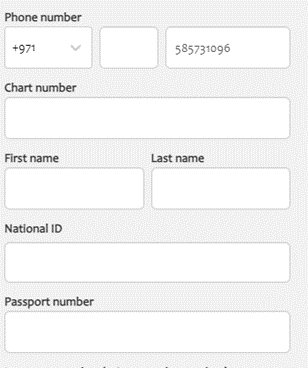
After this process is over, we move to fill in the appointment details
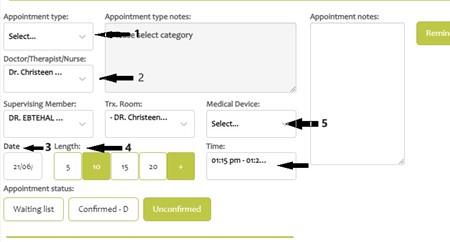
  1. Appointment type: we fill it with the needed treatment.
  2. Service provider: doctors, nurses or
  3. Date: we choose the date based on patient request and provider’s
  4. Length: is the duration of the session which varies depending on each treatment.
  5. Medical device: some treatments need to assign a medical device
  6. Time: we choose it based on patient request and providers availability

After filling all required information, we hit the save button at the top right side of the screen

To check the appointment type and duration, kindly check the following link:

4- How to move an appointment:

We click on the appointment that needs rescheduling then we click on the button “move”
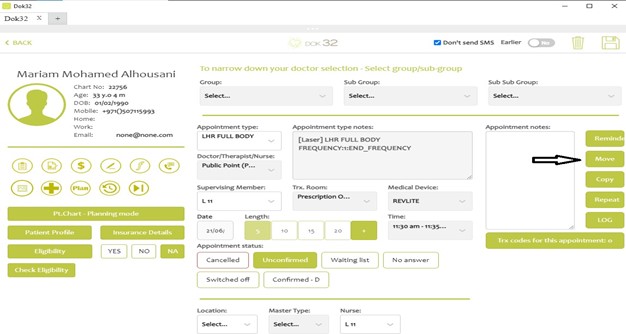
Then we can change the data (appointment type, service provider, date, time, and length)

Once we changed needed date, we just click the save button.

5- Appointment status:

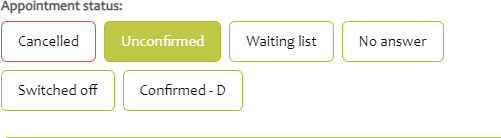
  1. When we any book the appointment is automatically “unconfirmed” as a status.
  2. Waiting list: is when a patient needs a certain date or time but is not available, we create an appointment an select the status as “waiting list “in case any cancelation we contact people on waiting list to accommodate them.
  3. No Answer: is the status we use when we call a patient for confirmation and they don’t pick up the call.
  4. Switched OFF: is the status we use when we call a patient for confirmation, we can’t reach their number.
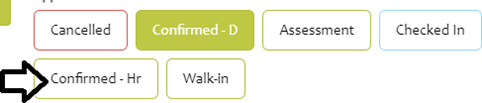
  5. Confirmed-D: is used as a first step confirmation we stat an appointment with it when we make sure booking is correct and convenient and did first step confirmation.
  6. We also Have Confirmed-Hr, which is step 2 of confirmation process when patients have confirmed their appointment

6- Appointment note:

when we need to remember a detail or communicate it with the team we write it in the appointment notes.
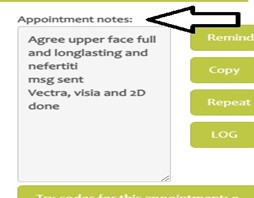
Table of Contents